I learned this from a friend and passed on to other friends, its a success always!!! SO here it is...
Tandoori Chicken Recipe:
Ingredients:-
To Marinate:
* 2 pounds chicken with skin and fat removed
* 1 teaspoon salt
* lemon
* green coriander leaves (if possible good amount like 1/2 bunch but not necessary )
* 1 cup plain yogurt
* 2-3 clove garlic
* 1 tbs fresh ginger root
* 1 or 2 tbs olive oil
* green chilli
* 1 tbs Tandoori Masala
To Bake:
* Oil or Pam spray
* 2 tbs chicken masala(any) (otherwise use garam masala and cumin powder)
* Salt (if needed)
* lemon
Method:
1. Remove skin from chicken pieces, and cut slits into them lengthwise. Place in a shallow dish. sprinkle both sides of chicken with salt and lemon juice. Set aside 20 minutes.
2. Put remaining ingredients of Marinate section into a grinder and grind
3. Spread marinate mixture over chicken. Cover, and refrigerate for 6 to 24 hours (the longer the better)
4. put chicken masala and salt(if needed) over chicken pieces. Try to cover chicken with masala as nicely as possible
5. Preheat an outdoor grill for medium high heat, and lightly oil grate OR preheat oven and oil a baking pan
6. Cook chicken on grill or in oven on 350 F aprox. 45 mins (until no longer pink and juices run clear )
7. Spray oil chicken pieces and turn the pieces upside down to cook other side.
8. spay oil and cook for 10-15 more mins. check that chicken is done (when it is easily breaking with a fork)
Serve with lemons and/or any green chutney!!! Enjoy ....
Wednesday, May 5, 2010
Tuesday, January 19, 2010
Cooking Spree...
Last Friday we invited few friends for dinner and my cooking neurons got all fired up... I cooked a lot and everything was tasty too!!! This does not happen often so I am proudly posting the memory of my rangeen friday into this rangeen collection...
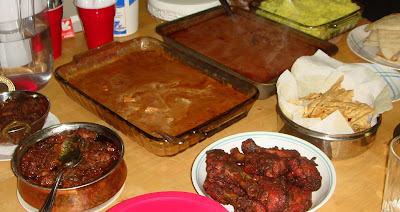
Here is the menu:
Thanks to a good friend of mine who is a 'queen of hosting' for great recipes and tips. It was a success !!! All these dishes are not difficult to make as I used to think. After cutting/chopping/preparation it took me 3-4 hours of watching TV serials and going in the kitchen during advertisements. (Ask me if you need recipe)
Wanted to be better in presentation and photography but cooking took all the time and energy! I know I need a good camera. btw, How do people serve lot of food in a beautiful or aesthetically inspiring manner ???
Go ahead and cook good food at home
You do not need to spend all that money in eating out
Its not difficult, its tastier and healthier!!!
If I can cook you can also cook!
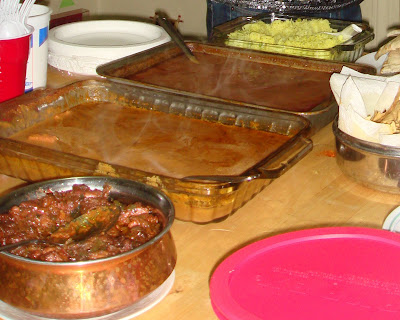
Happy Cooking...

Here is the menu:
- Daal Makhani (recipe)
- Shahi Paneer
- Kadhai Paneer & Kadhai Chicken
- Tandoori Chicken
Thanks to a good friend of mine who is a 'queen of hosting' for great recipes and tips. It was a success !!! All these dishes are not difficult to make as I used to think. After cutting/chopping/preparation it took me 3-4 hours of watching TV serials and going in the kitchen during advertisements. (Ask me if you need recipe)
Wanted to be better in presentation and photography but cooking took all the time and energy! I know I need a good camera. btw, How do people serve lot of food in a beautiful or aesthetically inspiring manner ???
You do not need to spend all that money in eating out
Its not difficult, its tastier and healthier!!!
If I can cook you can also cook!

Happy Cooking...
Wednesday, January 6, 2010
Painting a 'Peacock'
Peacock is the most beautiful bird (in my opinion).
I had this urge/wish to paint a huge peacock for one of the walls. As I don't want it to be a disaster I made this feather first. Which I believe is one of the most attractive parts of a good looking peacock. Central part of feather has peculiar shades and colors. I had to look at various photographs(close-up) of peacock. National geographic has a good one: Indian Blue Peacock. I used fine brushes to make the central part. AAhhh.. Here it is and I am happy with the outcome...

I wish I had a good camera and skills too to capture the real painting...
To paint the full peacock I don't have very fine brushes which I realized after starting the painting. Here is a drawing of incomplete work..

So for now everything is on hold and I am just happy with this feather!!!
I had this urge/wish to paint a huge peacock for one of the walls. As I don't want it to be a disaster I made this feather first. Which I believe is one of the most attractive parts of a good looking peacock. Central part of feather has peculiar shades and colors. I had to look at various photographs(close-up) of peacock. National geographic has a good one: Indian Blue Peacock. I used fine brushes to make the central part. AAhhh.. Here it is and I am happy with the outcome...

I wish I had a good camera and skills too to capture the real painting...
To paint the full peacock I don't have very fine brushes which I realized after starting the painting. Here is a drawing of incomplete work..
So for now everything is on hold and I am just happy with this feather!!!
Wednesday, September 30, 2009
India Trip 2009
I went to India in August. As always India Trip was memorable and rejuvenating !
Here is a clip of a shocking yet hilarious encounter of street celebrations on Ganesh Puja. (link)
Singing and dancing on streets yet in a different way. Moving traffic stopped and everybody was staring at the artists. I couldn't control myself and captured this moment. Yes I was shocked!
I didn't bother to do too much Photography in this trip. I was just enjoying and at times cribbing too. Here are few more pics from the trip.
Here is a clip of a shocking yet hilarious encounter of street celebrations on Ganesh Puja. (link)
 |
| From IndiaTrip2009 |
Singing and dancing on streets yet in a different way. Moving traffic stopped and everybody was staring at the artists. I couldn't control myself and captured this moment. Yes I was shocked!
I didn't bother to do too much Photography in this trip. I was just enjoying and at times cribbing too. Here are few more pics from the trip.
Thursday, June 11, 2009
Expressions!!!
 |
Note:
This is my sample drawing of famous Calvin Hobbes. It took me 1.5 hours to make it but being lazy, actually sitting down to start drawing it took me few weeks. I am planning (just planning yet) a bigger project and hopefully I will be able to finish it in few months. Lets see...
here is the original:
 |
| From CalvinHobbes |
Tuesday, April 14, 2009
Impromptu Sherando Lake Camping
We did an impromptu early spring camping at Sherando Lake Camping
Sherando Lake is one of the good places to camp near Charlottesville.
We were lucky to get group camp site which is free in winter.
We did not take many pictures. Thanks to the good company we had, here are few pictures...
Sherando Lake is one of the good places to camp near Charlottesville.
- Its easy to find a campsite here
- Its not too crowded
- Its beautiful and peaceful like all parks
- A car camping and day hike is pretty convenient
- Try to take the address and direction of lake before you start. GPS cannot find the lake by its name
We were lucky to get group camp site which is free in winter.
We did not take many pictures. Thanks to the good company we had, here are few pictures...
Wednesday, March 11, 2009
Happy Holi!
Holi is one of my favorite festivals. Can't remember any one holi when I was not soaked in colored water and my face is not looking like a color pallet. People used to recognize me only by my smile ( colored teeth too!)
If you have been playing holi all your childhood these things should be coming to your mind:
Finally, this year I made Gujiya. Being a first timer it tastes really good! Special thanks to Mr. Husband for the help.

I prefer to put photographs but Poonam suggested that I should also write recipes of dishes I make. So here you go!
Dough:
 Method:

Happy Holi!
If you have been playing holi all your childhood these things should be coming to your mind:
- Spring, sunny day with wind
- Flowers beginning to bloom and dust all around
- Bucket of colored water, pichkari, gubbare(water balloons)
- Holi songs, hasya kavi sammelan on TV
- Neighbours coming to your house with a plate/bag of colors
- A plate of gujiya, namkeen and Gulal ready in your porch for guests
- Bhang, Dahi bhalle and Gujiya :)
Finally, this year I made Gujiya. Being a first timer it tastes really good! Special thanks to Mr. Husband for the help.

I prefer to put photographs but Poonam suggested that I should also write recipes of dishes I make. So here you go!
Dough:
- 1-1/2 cup maida/ all purpose flour
- 1/4 cup oil
- 250 gms mawa/khoya
- 150 gms granulated Sugar(crushed like bura)
- 3 tbs kishmis/raisins
- 1 tbs shredded coconut(optional)
- 1 tbs cut cashews(optional)
- 1 tbs maida + 2 tbs water (mix to make a watery/liquidy paste)
- Gijiya maker or Dumpling press or Pierogi maker
- We didn't find the gujiya maker so had to seal the gujiya manually(it takes away all the beauty)
 Method:
- First make the filling so that it can cool while you work on dough
- In a pan, roast mawa/khoya for some time so that it turns light brown/pink.
- If you use fresh mawa, it will first melt into liquid and then it will start to solidify. keep stirring. Do not over cook.
- If you use mawa from Indian grocery store ( usually its 'Nanak khoya'). It will not melt and you need to mesh it before roasting. otherwise it will have lumps.
- Add sugar to mawa. add dry fruits and coconut.
- Heat for 2 mins. keep stirring
- Taste for sugar or anything needs to be added. Tasty filling makes tastier gujia.
- Let it cool
- Now make dough. Heat the oil for dough little bit. Add oil in the flour.
- Make dough. It should be hard dough. harder than the Indian puri dough but not too hard.
- Make small balls of dough. less than 1 inch should be fine.
- Make thin round sheets
- Now, add 1 or 2 spoons of filling in the center of round sheet
- Put sealing mix at the edges of sheet to make a circle.
- Carefully turn one half of sheet on the other half. take care the filling doesn't come in between the sealing.
- Press the edges. You can use fork to seal and make design. You can fold the ends to make the design. Overall stress is on carefully folding so that it wont open while frying.
- Make few and cover with wet cloth.
- 16) when ready deep fry on low flame. I had little higher flame for few and gujiya turned out to be golden brown. Usually its more on whiter side.
- See photograph. Few sealed with fork, few folded, few darker and few lighter:) .. (first timer).. All are tasty!
- You can get Gujia maker, Pierogi maker, Dumpling press online or in the market. Need some research.
- You can use dumpling sheets/ wanton wrap sheets. It makes the process way easier.
- Some would prefer to bake in place of frying. Authentic Gujia is deep fried.

Happy Holi!
Subscribe to:
Posts (Atom)